Thursday, 13 June 2013

Layer Styles in Photoshop

Layers styles are a HUGE thing in make stuff work in photoshop.

Using the layer styles you are able to add;
  • Drop/Inner Shadows.
  • Gloss.
  • Colour/Gradient Overlays.
  • Glow Effects.
  • Bevel and Emboss.
  • Texture.
With these you can create things like this.


This is what you can achieve with the layer styles, I've used a slight bevel and emboss style for a slight 3d effect and a gradient overlay for the colour along with a drop shadow for some depth of field, I didn't change any of the settings within the styles a lot of this is default apart from the colours.

A link to the tutorial of which will go more in depth is: http://www.tutorial9.net/tutorials/photoshop-tutorials/layer-styles-in-photoshop/

How To Use Filters

With the use of filters, you are able to make a photo seem and feel like something completely else.

The use of renders are rather extensive in the use of a lot of photo manipulation, some of these filters include;
  • Scewing the image.
  • Creating clouds.
  • Lense Flares.
 These can change the mood of an image or even help you create an image from scratch.

http://help.adobe.com/en_US/photoshop/cs/using/WSfd1234e1c4b69f30ea53e41001031ab64-7986a.html

This link goes through the basic of how to use them in more detail.

Wednesday, 12 June 2013

Changing an Image to Black and White

Change an image is rather easy, but can be achieved by 2 different techniques, One technique is using an adjustment layer, or just going up to image > Adjustment > Black and White.

With a black and white image, it adds more drama to the image and give it more meaning.

A little hint with black and white, is just normal black and white looks alright, but I've been taught to add a slight tint of blue to certain images and it gives the image a whole different feel.

For example this is the standard image.


This image was the original one I started with, The one below it is of course the black and white image that I created from the original.


There is many tutorials that would go into greater detail than me for this kind of technique, this technique would make a image stand out, with black and white images you do not need to worry about the kind of light when either find or taking the image.

Blending Modes Within Photoshop

With the blending modes, there will help make an image more subtle or harsh.
These modes such as;
  • Overlay.
  • Multiply.
  • Colorburn (Linear, Add)
These modes will help to sharpen an image, e.g.


As you can see this image is rather dull, low lighted, soft image. With a few hits with the blender options using Overlay and Multiply on an adjustment layer it could look like this.


This tutorial I found rather easy, it is a very easy and basic for beginners just starting out.

Sunday, 26 May 2013

Diamond Style Tutorial

This tutorial is much more advance than all the other tutorials.

This tutorials uses many different elements such as;
  • Different blend modes.
  • Different filters.
  • Many different brush options.
  • Creating brushes from scratch.
I had trouble with trying to get a nice spacing in between the diamond shaped brushes.


 This is the results of my attempt.

This is the link on this tutorial: http://www.youtube.com/watch?v=XppFKFkud7w

Image Resources and Brushes

This post is just about how to get free images and good brush styles.

Brusheezy: http://www.brusheezy.com/
Render Gallery: http://planetrenders.net/renders/
Fonts: http://www.dafont.com/

With the Render Gallery, You will have to register to this site to be able to view the images in full resolution.

Removing Red Eye From Flash

RED EYE TUTORIAL

With this eye tutorial, you'll be able to save any image from any red eye problems.

You'll learn how to use adjustment layers and blur filters.

This is the results of this tutorial.
This is the results of my attempt.

This is the tutorial link on how to do this: http://www.methodshop.com/gadgets/tutorials/psredeye/

Sunday, 19 May 2013

Creating Stars From Scratch

STARS

This tutorial is on how to create stars from scratch.

This tutorial needs you to know how to use many different filters within photoshop such as;
  • Levels.
  • Add Noise.
  • Blur.
This is the results of my efforts:

Creating A Sun From Scratch

This tutorial is on how to create a sun that looks pretty good.

Things you will need to use;

  • Marquee Tool.
  • Filters.
  • Adjustment Layers.
  • Colour Balance.
This is the finished result of my efforts.

This is the link I used to help create the sun: http://www.tutorialwiz.com/sun/

Sunday, 12 May 2013

Changing the Background of the Image

This tutorial will show you how to change the background of a selected image.

I had troubles with my selections due to the image I had selected. Here are the images and results of which I accomplished.


Tips: Adding blur to the background brings the viewers focus to the foreground image.

http://psd.tutsplus.com/tutorials/tools-tips/changing-your-background/

Sunday, 28 April 2013

Tribal Symbol Tutorial

This tutorial I found rather fun to make, it uses random shapes that are made with the Oval Marquee Tool.

This tutorial, has a lot of space for error, as you can create many other shapes apart from the shape that the tutorial uses.

http://www.youtube.com/watch?v=igFNGWAPbao

With this tutorial, There was no hassle in following this, I had no trouble doing any part of this.

The results of this tutorial are as followed;


Photo Manipulation

In this tutorial, This tutorial shall show you how to accomplish the use of photo manipulation.

This technique is rather tricky and shall put up a video tutorial off youtube up to show you how to achieve this technique and show you the results of what can be made of this tutorial.

https://www.youtube.com/watch?v=wOx-tIL1s6Y

This youtube tutorial comes with reference images on which you can fulfill the tutorial.

WARNING: This video tutorial is a slightly difficult and will involve other techniques needed to achieve this result. Some of the techniques that are involved within this tutorial are;

  1. Color Correction.
  2. Quick Selection Tool Experience.
This is the results of the tutorials;

Sunday, 24 March 2013

Colour Correction

Within this post I'll discuss Colour Correction.

Colour Correction can be used for a range of things, If a photo is to under exposed, Has to many shadows and you want to bring some of the details forward, this is a quick and easy way to fix an image.

Firstly, I had to find an image on which it was under exposed, and I thought it would be worth fixing up.

Next I bought the image into photoshop and started to tinker with it, I started with adjusting the levels of the image which I just bought into photoshop by hitting Command + L (For Macs) or Control + L (For Windows).

This brings up the level adjuster and allows you to work with either the whole RGB colour scale or each individual colours (Red, Green and Blue)

Adjusting individual colours can give you a more bizarre feel by using too much green or any other colour, But using the default White and Black Balance will allow you to get rid of dark shadows.

REMEMBER! The more times you do this and confirm the change the more you will damage the image and have to start over! (I had trouble with this first time starting out)

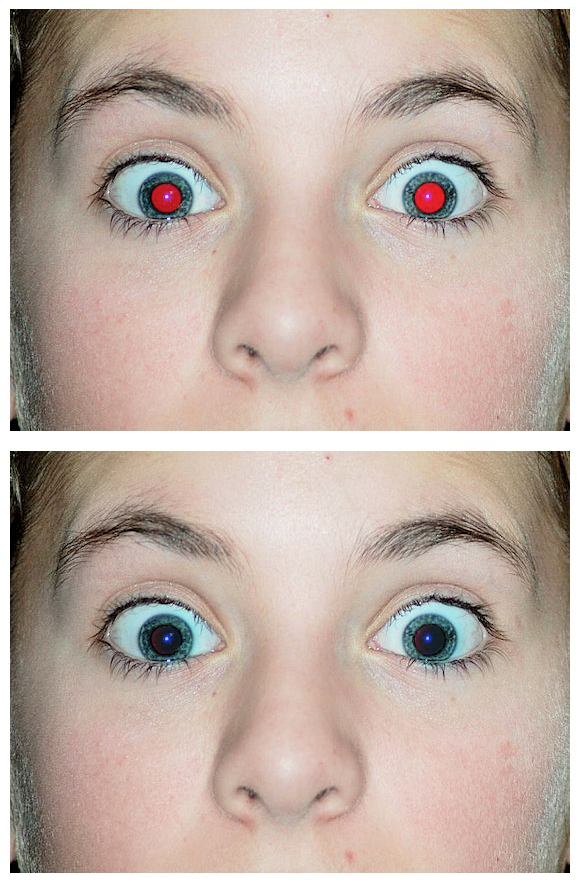
This is what I have accomplished within this explanation;


These are some other colour correction tutorials on which you can accomplish this same effect;


Photoshop Introduction

This post is what I shall be learning and how I'm going to accomplish this task I will be going through the basics of photoshop and progressively getting harder tutorials and learning more advanced techniques.

Some of these skills are;
  1. Photo Manipulation.
  2. Photo Correction.
  3. Using The Tools Of Photoshop.
  4. Using the blending options.
  5. Masks.
These are only a few great things of which photoshop is capable of.